The photos and measurements on this page were provided by Stephen Miller of BV Colonial Crafts. On a computer, the size of the photos can be reduced by reducing the width of the window.
The pictures show a 19th century muzzle loading rifle attributed to the Somerset County, Pennsylvania gunsmith Jacob Mier. The rifle was wrecked by a barrel explosion that was probably caused by the use of smokeless gunpowder, which creates far more pressure than black powder. In its demolished state, the rifle reveals construction details that are normally hidden. In addition to the damage from the barrel explosion, the rifle also has an interesting period repair of the wrist.
The Jacob Mier attribution is based on the various features of this rifle that are similar to or identical to the corresponding features of the Jacob Mier percussion rifle that is shown at the bottom of page 113 in the 2001 book "Gunsmiths of Bedford, Fulton, Huntingdon, & Somerset Counties" (hereafter, "the p. 113 rifle").
Stephen Miller reports that the rifle was found in the attic of an old log building along the Brotherton Road that used to be a church. Stephen reports that the individual who found the rifle also found church records in the log building that identified a man named John Mier as a minister of the church. It seems reasonable to wonder if the minister had something to do with the rifle ending up in the attic of the building.
This page is part of an online project that features the old-time guns and gunsmiths of Bedford and Somerset counties, Pennsylvania.
L. Dietle

Photos
The following image is a composite of two photos of the burst portion of the barrel. The left-hand photo shows that in machinist-terminology, the barrel is "bottom-tapped" for the breech plug. The barrel threads are only about one thread deeper than the threads on the plug. The right-hand photo shows where the threads for the drum are located relative to the threads for the breech plug. The twist of the rifling can be seen in both photos.
The next image is included to provide an overall view of the shape of the buttstock, which is a close match to the shape of the buttstock on the p. 113 rifle. Note the slightly convex shape of the top line of the comb. The photo also shows that the wrist had been damaged prior to the explosion, and had been repaired with a brass sheet. The buttstock incorporates a protective toe plate.
The next photo provides a view of the overall patch box area of this old gun. The piercing shapes and the peripheral shape of the missing patch box side plates are identical to those of the side plates of the p. 113 rifle. The patch box lid is 3-3/4-inches long and 1-1/16-inches wide, and the outer surface is convex, which facilitates stiffness. Also visible in the photo is the transverse pin that retains the rear of the trigger guard to the stock.
The next photo is a close-up view of the symmetric unengraved patch box finial of this interesting Somerset County long rifle. The peripheral shape of the finial and the shape of its piercing are identical to that of the p. 113 rifle. At the hinge, the finial is 1-7/8-inches wide. From the hinge to the tip, the finial is 3-1/4-inches long. These dimensions can be used to scale the other dimensions of the patch box.
The next photograph shows the toe plate, which acts as a release for the lid of the patch box. The overall length of the toe plate is 2-3/16-inches.
The next photograph provides a top view of the cast-brass crescent-shaped buttplate.
The next photograph shows several interesting details, such as the threads on the breech plug, the remains of of the lock bolt, a closer view of the wrist repair, the trigger adjustment screw, and the tip of the tang screw. The tail end of the trigger plate is fastened to the stock with a wood screw. The tips of two other screws are visible to the rear of the set trigger, and I wonder whether one or both of them are part of the stock repair. The underside of the cast brass trigger guard has a rectangular projection at the rear of the bow that is like the projection on the guard of the p. 113 rifle. You also see that the front of the trigger guard was secured to the stock with a transverse pin. The blunt trailing end of the stock panel for the lock is shaped the same as the trailing ends of the stock panels on the p. 113 rifle. Click here and here to see other rifles attributed to Jacob Mier that have stock panels with the same blunt trailing end shape. The lock mortise shows that the missing lock had a rounded tail, as does the lock on the p. 113 rifle. At the rear of the lock panel, the wrist is 1-3/8-inches in height and 1-1/4-inches wide. The bow of the trigger guard is 2-1/2-inches long and 1-inch in height, and the grip rail is also 2-1/2-inches long.
The following photograph provides a bottom view of the trigger guard. The design features are harmonious with the limited view of the decorative geometry that can be seen in a side view of the p. 113 rifle that is published in the 2001 book.
The following photograph shows a bottom view of the 4-5/8-inch-long trigger plate.
The following picture provides a top view of the period wrist repair. The brass sheet is retained to the stock by screws, and covers up a portion of the tang.
The next image is a composite that provides three different views of the breech plug after it was removed from the gun. The tang is 2-1/2-inches long and 3/8-inch wide.
The next photo provides an oblique view of the crescent buttplate and the patch box region with the patch box door closed. The buttplate is 4-7/16-inches tall and 1-3/8 inches wide, and its comb length is 3-inches.
The next photo provides a look inside the patch box, with the lid open, to show the lid spring and the patchbox release latch. The markings on the floor of the patch box recess of the stock reveal that a wood bit was used to rough-out the recess.
The following picture was taken to highlight the patch box spring, which is a piece of spring steel strip that has been bent to an L-shape and has a curled end that contacts the underside of the patchbox lid. The spring is simple and functional, and takes up very little space. The walls of the patch box stock recess feel greasy, as if the patch box was used to store greased patches.
The next photo is included to show the location of two of the under lugs relative to the rear sight. The next image is a composite that provides three different views of the rear sight, which is 3/16-inch tall and 11/16-inch long. The rear sight may have been bent to its L-shaped configuration.
The next photo shows a decorative element formed into the right-hand side of the surviving fragment of the forestock. Notice the fancy termination of the decorative design just to the rearward of the forward barrel pin. The surviving brass ramrod pipe is 2-7/16-inches long and has an inside diameter of 5/16-inch. As with the p. 113 rifle, the hole for the surviving barrel pin is not protected by an escutcheon.
The following image is a composite that provides oblique and bottom views of the forward ramrod pipe. The green color is verdigris. The front under lug is visible in both photographs.
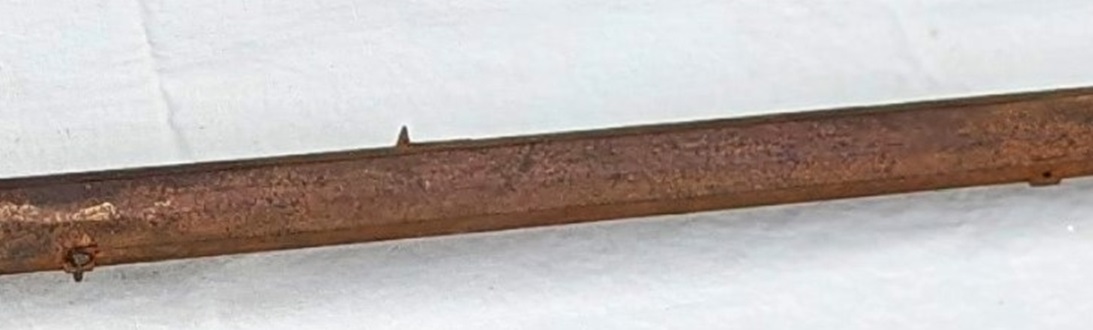
The next photo, which provides a foreshortened view, was taken to show the swamped nature of the octagon barrel. The barrel measures 1-inch across the flats at the muzzle and breech, but tapers down to as narrow as 7/8-inch in between. The photo also shows the the general shape of the dovetailed rear sight.
The following image is a composite that provides three different views of the dovetailed front sight, which is 1-inch long and 1/8-inch tall.
The next photo shows the seven groove cut rifling in the bore of the barrel. By direct measurment, and by scaling the picture, the bore seems to be about 38 caliber (i.e., about 85 lead balls per pound). The nose cap is missing.
The next photo shows the decorative carving on the left-hand side of the surviving fragment of the forestock. The barrel is pinned to the stock just forward of, and just the the rear of, this decorative carving. Click here to see an alternate view of the rear portion of this carving.
The next photo is provided to show the curly grain of the maple stock.
The next photo provides an oblique view of the left-hand side of the buttstock, to highlight the shape of the moulding along the lower edge of the cheekpiece. The cheekpiece is 3-1/2-inches long. The next photo provides an overall view of the left-hand side of the buttstock. As with the p. 113 rifle, the cheekpiece of this rifle does not incorporate an inlay, and there is no moulding along the lower edge of the buttstock.
The next photo shows the incised carving to the rear of the cheekpiece. The overall shape of this incised carving is similar to the shape of what appears to be relief carving on the buttstock of the p. 113 rifle. Click here for a larger view of the carving. Click here to see another rifle attributed to Jacob Mier that has a similar style (as opposed to shape) of incised carving.
The next photo provides a slightly oblique view of the buttstock, looking down at the comb and cheek piece. The rear of the cheekpiece projects about 1/4-inch from the adjacent surface of the buttstock, and the front of the cheekpiece projects about 1/8-inch.
The next photo provides a straight-on view of the lock bolt plate (aka side plate). The periphral shape of this lock bolt plate appears to be identical to the lock bolt plate on the p. 113 rifle. The tang bolt is visible in this view, and appears to have been bowed rearward by the force of the explosion. The explosion also forced the hair trigger to rotate into contact with the trigger adjustment screw.
The next photo provides a slightly oblique view of the lock bolt plate, and shows that the peripheral shape of the lock bolt plate is not a result of breakage. The grain of the wood that was exposed by the break is noticibly curly. The photo also provides a good look at the left-hand side of the old wrist repair.

The first photo is included to provide an overall view of the remains of this antique black powder rifle. A significant portion of the underside of the breech of the full octagon barrel is blown out. The barrel and trigger guard are bent, and the lock and most of the wooden forearm were blown off by the force of the explosion. A bit of the forestock remains attached to the barrel, revealing that this interesting "rusty relic" was built as a full-stock rifle. The barrel length is 41-1/8 inches.


 The next image is a composite that provides three different views of the rear under lug. The under lugs, which are dovetailed to the barrel, are 3/8-inches long and project 1/8-inch from the bottom barrel flat. In addition to being dovetailed, this under lug is also staked to the barrel with punch marks. The metal cross-pin that retained the forearm to the barrel was bent by the explosion of the barrel, and is still present. Click here to see a larger view of the under lug that also shows what appears to be grinding marks (or possibly filing marks) on the barrel flats.


![]()
